Note: This article contains affiliate links. If you buy something through one of those links, Parlor City Sound may earn a small commission, and it doesn't cost you anything when that happens. We only link to gear and services relevant to the topic. And our opinions aren't for sale. If we recommend a product, it's because we think you might like it as much as we do.
At some early point in your journey to build a home recording studio, you’re going to end up looking at recording studio microphones. And it cannot be understated just how overwhelming that process can be. Terms like “polar patterns”, “phantom power”, “dynamic versus condenser” … it’s a lot to take in all at once, especially without help.
If you’re a solo artist tracking vocals and maybe a guitar, you can get by with one or two mics. And if you’re a band hoping to record vocals, guitars, bass, drums, and whatever else … well, one mic isn’t going to cut it. And even if you’re saving money buying used gear on sites like Reverb, chances are your recording studio microphones will gobble up a big portion of your overall home studio budget—if not a majority share.
So let’s demystify recording studio microphones. How do they work? How do they differ from the mics used in live sound? What do all of these industry buzzwords mean? And what sorts of microphones will you need?
The basics of how recording studio microphones work

Let’s start with a brutally simple explanation of the basics of how microphones work. Not just recording studio microphones, but all microphones.
Sound waves are created when a vibration sends waves of pressure away from its source. A person singing, a snare drum getting whacked, or a tree falling in the woods when nobody is around to hear it—they all create vibrating sound waves of pressure that radiate away from their source. Sort of like when you drop a pebble in still water.
There’s a reason why in space, no one can hear you scream. There’s nothing in outer space to vibrate with sound waves. Meanwhile, here on Earth, sound waves vibrate particles in the air, and those vibrations ripple into the next particles, and so on.
The louder a sound is, the bigger its sound wave is and the further it can travel. For instance, a whisper likely won’t cross a larger room. But something really loud, like an explosion or a jackhammer or your mother-in-law’s ceaseless criticism, creates a huge sound wave and travels a lot further (sometimes unfortunately). The sound waves have more volume, and thus they’re louder and travel further.
Microphones have small vibrating diaphragms that are rattled by sound waves. Electrical coils pick up those vibrations and transform them into electrical signals. Those signals can then be heard through a speaker or captured on a recording.
By playing around with the electrical signals and how they pick up sound waves, various types of microphones have been invented that process sound waves in different ways. They also pick up sound waves in different patterns–general shapes around the microphone where they pick up sound, or don’t. More on that shortly.
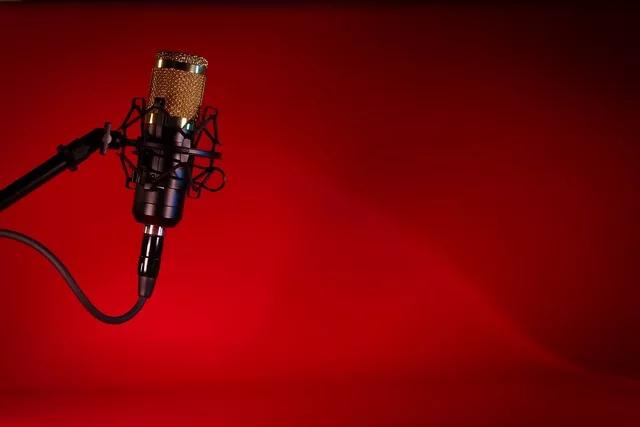
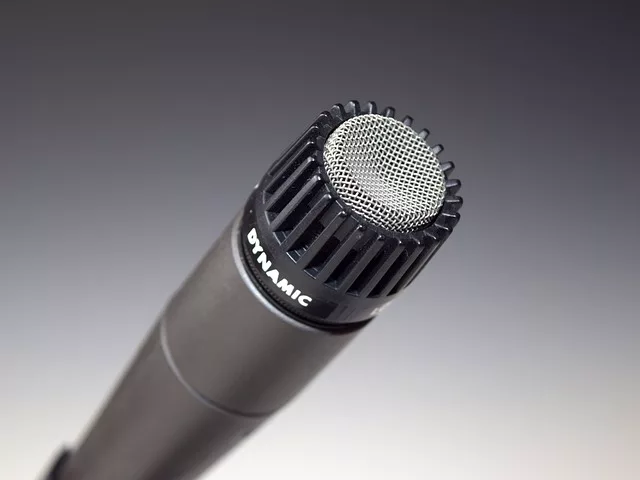
Dynamic microphones vs. condenser microphones
There are two primary types of recording studio microphones you’ll end up using. Dynamic and condenser microphones are similar, but generally serve different purposes.
Dynamic microphones use electromagnetism and transformers capture sound. Condenser microphones use variable capacitance instead of electromagnetism. Their coils vibrate over an electrically-charged backplate that essentially works like a sort of battery.
Both types of microphones need electricity to function, which is provided by a microphone preamp. But condenser microphones need special “phantom power” to function.
Dynamic microphones are usually a bit tougher than condensers and more concerned with volume than quality. They’re great for loud sources like drums, horns, and guitar amps.
Condenser microphones are often more delicate and their signals are a bit softer. They’re more focused on quality than volume, more accurately picking up every little nuance of the sound, but not usually handling louder volumes as cleanly.
Diaphragm sizes
Microphones (particularly condenser mics) also come with small, medium, or large diaphragms. And that can drastically change how they interpret sound waves and what frequencies of waves they pick up best.
Small diaphragms, which are usually less than half of an inch in diameter, handle higher frequencies and higher volumes better than larger ones. You’ll often see these “pencil” mics being used as drum overheads or on hi-hats, where you have higher frequency and volume levels, but you want a more accurate representation of the sound than dynamic mics typically provide.
Large diaphragms, which are generally bigger than three-quarters of an inch, are better suited for lower and midrange frequencies. The added broadness makes them better at recording vocals and just about any musical instruments under the sun, apart from cymbals and other high frequency, high volume sources. That said, some engineers use large diaphragm mics more freely, even as drum overheads, because they capture such a rich sound.
More rarely you may also encounter self-proclaimed “medium diaphragm” mics. These often have diaphragms between half an inch and one inch, three quarters of an inch in diameter. These mics are good for vocals and guitars, and really good on toms.
What are microphone polar patterns?
Now that we have a basic understanding of how recording studio microphones work and what makes them sound different, we can explore where microphones pick up the sound around them.
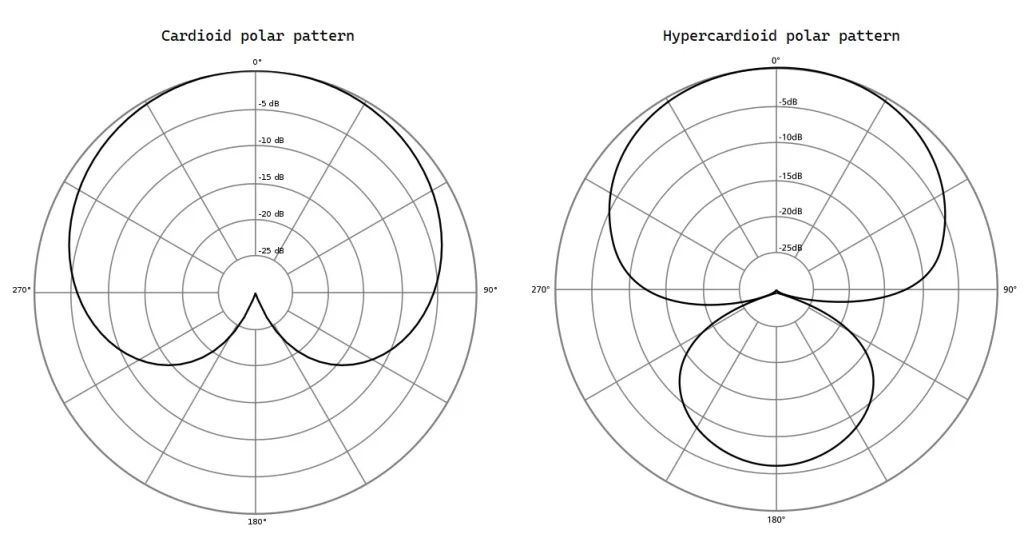
Microphones have polar patterns, which determine the direction(s) from which the microphone picks up sound the strongest (and, of course, the weakest). Looking at a microphone’s polar pattern tells you which angles they get sound from the best, and where they tend to not get sound at all.
You’ll usually find a microphone’s polar patterns depicted on the box they came in, and sometimes shown right on the microphone itself. If not, you can search for the microphone’s polar pattern online from the manufacturer.
- Cardioid mics are the most common, especially with dynamic mics. Imagine a heart, where the mic’s diaphragm is in the middle. That’s a cardioid pattern. These mics pick up sound from the front (or the top), a bit less from the side, and way less (or not at all) from the back
- Supercardioid mics are a bit more focused on picking up sound from the front. They’ll usually also pick up a little from the back
- Hypercardioid mics are similar to supercardioid mics, but they pick up even more in the back
- Omnidirectional mics pick up sound from all sides equally in one big circle
- Bidirectional mics, also known as figure eight mics, pick up from the front and back equally, and not from the sides
What does ‘Max SPL’ Mean?
As you explore this wonderful world of recording studio microphones, you’re going to occasionally come across the phrase “max SPL”, as in “this mic has a really great max SPL”. And if this guide has been useful to you thus far, there’s a pretty good chance you’re going to wonder what in the heck “max SPL” refers to.
“SPL” means “sound pressure level”. It’s the highest sound volume, in decibels, the microphone can take in before the signal gets distorted. Recording studio microphones with really high max SPL levels can handle louder sounds without losing their cool.
A person speaking at a normal volume usually has an SPL ranging from 50 to 70 SPL, while singers often land in the 85 to 95 range. Screaming or belting? That can land between 100 and 140 SPL. Snare drums and cymbals reach 100 to 150. The kick drum usually has the highest SPL of anything in a recording studio, ranging from 125 to 150 (assuming you’re using a mic inside the kick).
When shopping for recording studio microphones, higher SPL is better for louder sources (drums, guitar amps, or screamy vocalists). But we should also mention that recording at excessive volumes might reduce sound quality overall, and those mics that can handle high max SPL aren’t always the best at capturing more articulate stuff, like vocals or acoustic guitars.
Other features to look for in recording studio microphones
Some microphones have other features that improve their functionality in different ways, so let’s take a quick look at some of those too.
- On/off switches can be found on some mics, especially dynamic mics. These are often used in live settings and allow you to quickly silence a mic when you don’t want it on.
- PAD (passive attenuation device) switches are usually found on higher-end condensers. These attenuate (a fancy word for “reduce”) the signal the microphone is sending to the preamp. This is useful when recording louder high SPL instruments and super loud or screamy singers
- High pass and low pass filters allow higher frequencies or lower frequencies to “pass” through to the preamp, while reducing the opposite signals. In other words, a high pass filter allows higher frequencies through but filters out the lower ones.
Which microphone accessories should you get?
That covers all of the basics of how microphones work and what features to look for. But what about all the other equipment that helps make recording studio microphones easier to use?
First, the obvious: mic stands are pretty straightforward. You can find them straight, with arms, and with telescoping arms (meaning they have a smaller internal arm that can slide in and out of the bigger one). You might want to invest in one or more low-profile stands, too, which are useful for miking kick drums and guitar amps/ cabs, and anything else that sits low to the floor.
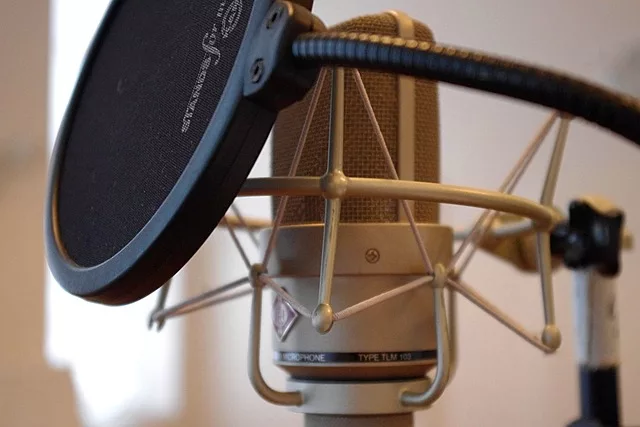
Pop filters are used to prevent plosives from hitting the mic. A plosive is a burst of air generated by hard “P” and “T” sounds. That awful, almost spitty sound you make when you say those letters? They sound even worse on a microphone. Get your singer a pop filter for sure!
XLR cables, also known simply as “microphone cables,” connect the mic to a preamp, mixer, etc. Don’t worry about buying the most expensive mic cables around. Mogami Gold cables are fantastic when you’re running a $1000+ microphone into a top flight preamp, but won’t offer any distinct value when your gear is low-range or mid-range.
Some examples of useful recording studio microphones and what they’re great at
Now that we have a decent understanding of how recording studio microphones work, let’s take a look at some actual microphones you might use around the studio. We’re not going too in-depth here, but definitely check out the guides at the end of this article if you’re looking for more recommendations for recording studio microphones.
Vocals and Guitars
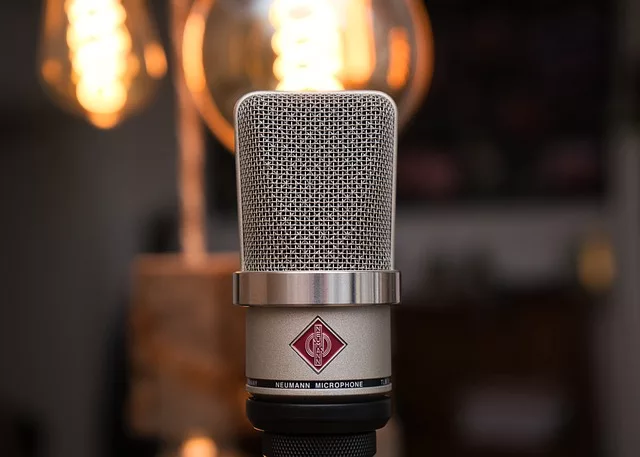
- Vocals: You’ll usually want a large diaphragm condenser like the Rode NT1 Signature Series ($159), the Audio-Technica AT4040 ($299), or the Neumann TLM 102 ($899). You might also consider using a dynamic mic like the legendary Shure SM7B ($439)
- Acoustic Guitars: Any large diaphragm condenser will do, though many engineers prefer small diaphragm condensers, like the ones you’d use for drum overheads (see below).
- Guitar Amps and Cabs: The Sennheiser e609 ($100) is a fantastic dynamic mic that’s purpose-built for this task. Many engineers will use the tried-and-true Shure SM57 ($99), and some with bigger wallets prefer ribbon mics like the Royer R-121 ($1500)
- Bass Amps/ Cabs: Many engineers stick to the SM57 for this task, and some (myself included) prefer using a kick drum mic. Personally, I use a Sennheiser e902 ($200) alongside an SM57.
Drums
- Kick Drum: The aforementioned e902 is great in a kick. So too are the Shure Beta 52A ($219), the AKG D112 ($229), the Audix D6 ($199), the sE Electronics V Kick ($219), and the Telefunken M82 ($399)
- Snare Drum and Toms: Most engineers use an SM57—are you noticing the trend here? The Shure Beta 57A ($169) gets high marks as well. The Telefunken M80-SH ($249) is phenomenal, and I personally use a Sennheiser e604 ($150). All of these work excellent on snare drums, and they’re fantastic for toms too. The M80-SH and e604 are a bit more purposebuilt than the two Shure entries.
- Drum Overheads: Small diaphragm condensers are typically preferred here, like the Behringer C-2 ($52 for a matched pair), the sE Electronics sE7 ($249 for a matched pair), the Lewitt LCT 140 AIR ($349 for a pair), or the Shure SM81 ($439 each). I personally use a pair of Audio-Technica AT4041SPs ($549) for drum overheads.
Now that you understand recording studio microphones, here are more useful home recording guides!
Recording studio microphones are as numerous as they are complicated. There are options for pretty much any scenario you may encounter in a home recording space or a professional studio. And I doubt it’s possible to meet two sound engineers who wholeheartedly agree on which are the best recording studio microphones. One mic sounds better to one person’s ears than someone else’s.
We suggest you start small, experiment, and work your way up into those bigger, fancier microphones. And remember, condenser mics have the hidden cost of requiring phantom power, too. They can pull that from microphone preamps, and most audio interfaces and mixers feature phantom power too. But they aren’t going to work without it, so be sure to account for that while budgeting your home recording studio!
We hope this guide was helpful! We’re going to leave you here with some links to more guides we’ve written that you might also find useful. Peruse these at your leisure. And if you have suggestions for guides you’d like us to write, head over to Facebook or Instagram and drop us a line. Oh, and be sure to follow us, too—the Greater Binghamton region makes some really phenomenal music, and we do a lot of free guides like this too!


